I am going to start this blog with a simple explanation of a misting plant propagation system we just built on the homestead. We use lots of fresh food for our tube fed girl. If we want to grow it ourselves it means lots of plants. Plants from nurseries are so expensive, we knew there had to be a better way. Here is what we found!
Overview: The system works by placing small softwood and hardwood cuttings off the plants we have into a sand bed. Every few minutes they are misted from above for a few seconds. The mist keeps the humidity up and reduces evaporation from the leaves. Its exactly like the produce isle at the supermarket! When the cuttings have the water and energy they need, they can focus energy on producing roots. Some of my cuttings have rooted in as little as a week. Most of the systems that do this are expensive to say the least, so I found myself motivated to build an inexpensive version and put it out to the world. hope you enjoy.
Parts list:
-Electronics:
Arduino based trinket - available
here at amazon
DHT11 temperature and humidity sensor - available
here at
amazon
DC coil relay - available
here at amazon
RGB LED -available
here amazon
Breadboard and wires (opetional but makes life easy!) - available
here amazon
-Plumbing
Servo sprinkler valve -
This is the one I use from amazon
Inline filter - available
here from amazon
PVC pipes and fittings
Misting heads X5 - available at
dripdepot
Wood and screws for sand box
Sand
To start with, build a suitable box to hold the sand. I chose to build mine about 2 feet by 4 feet and you want the sand to be about 6 inches deep. This box should be positioned in a medium warm place that gets filtered sunlight to shade. You want to error on the shade side, as too much sun will kill your plants quick. I put mine in the greenhouse and put shade cloth on the outside wall of the greenhouse. This keeps the bed from getting direct sunlight.
Next, there needs to be water near you sight. Make sure you use hard pipe, like PVC or metal pipe. If you just ran a hose you could deal with significant problems when the hose bursts because its under constant pressure. From your water source, place an inline filter and then the sprinkler valve. Then work with the PVC to get one streight run over the center of the sand bed. For my 2x4 bed, 5 misters did a good job covering the whole thing when placed about 2 feet above the bed. Make sure to glue all your joints and run water through all the PVC for a min or two to flush out particulate before installing the misters.
Here you can see the servo sprinkler valve. 3/4'' PVC going in and out.
Now we are on to the fun part, the electronics. This is the part that you save hundreds on by using an arduino based system vs, whats available through greenhouse supplyers. We can build the same system, with a little soldering.
The photo shows the entirety of the electronics that control the system. a little messy, yes, but this is still in proof of concept form. It keeps working so well, i have not cleaned it up or water proofed it yet.
This is the arduino based micro controller. They can be found on amazon for about $10. See the link in the materials for an easy to program version.
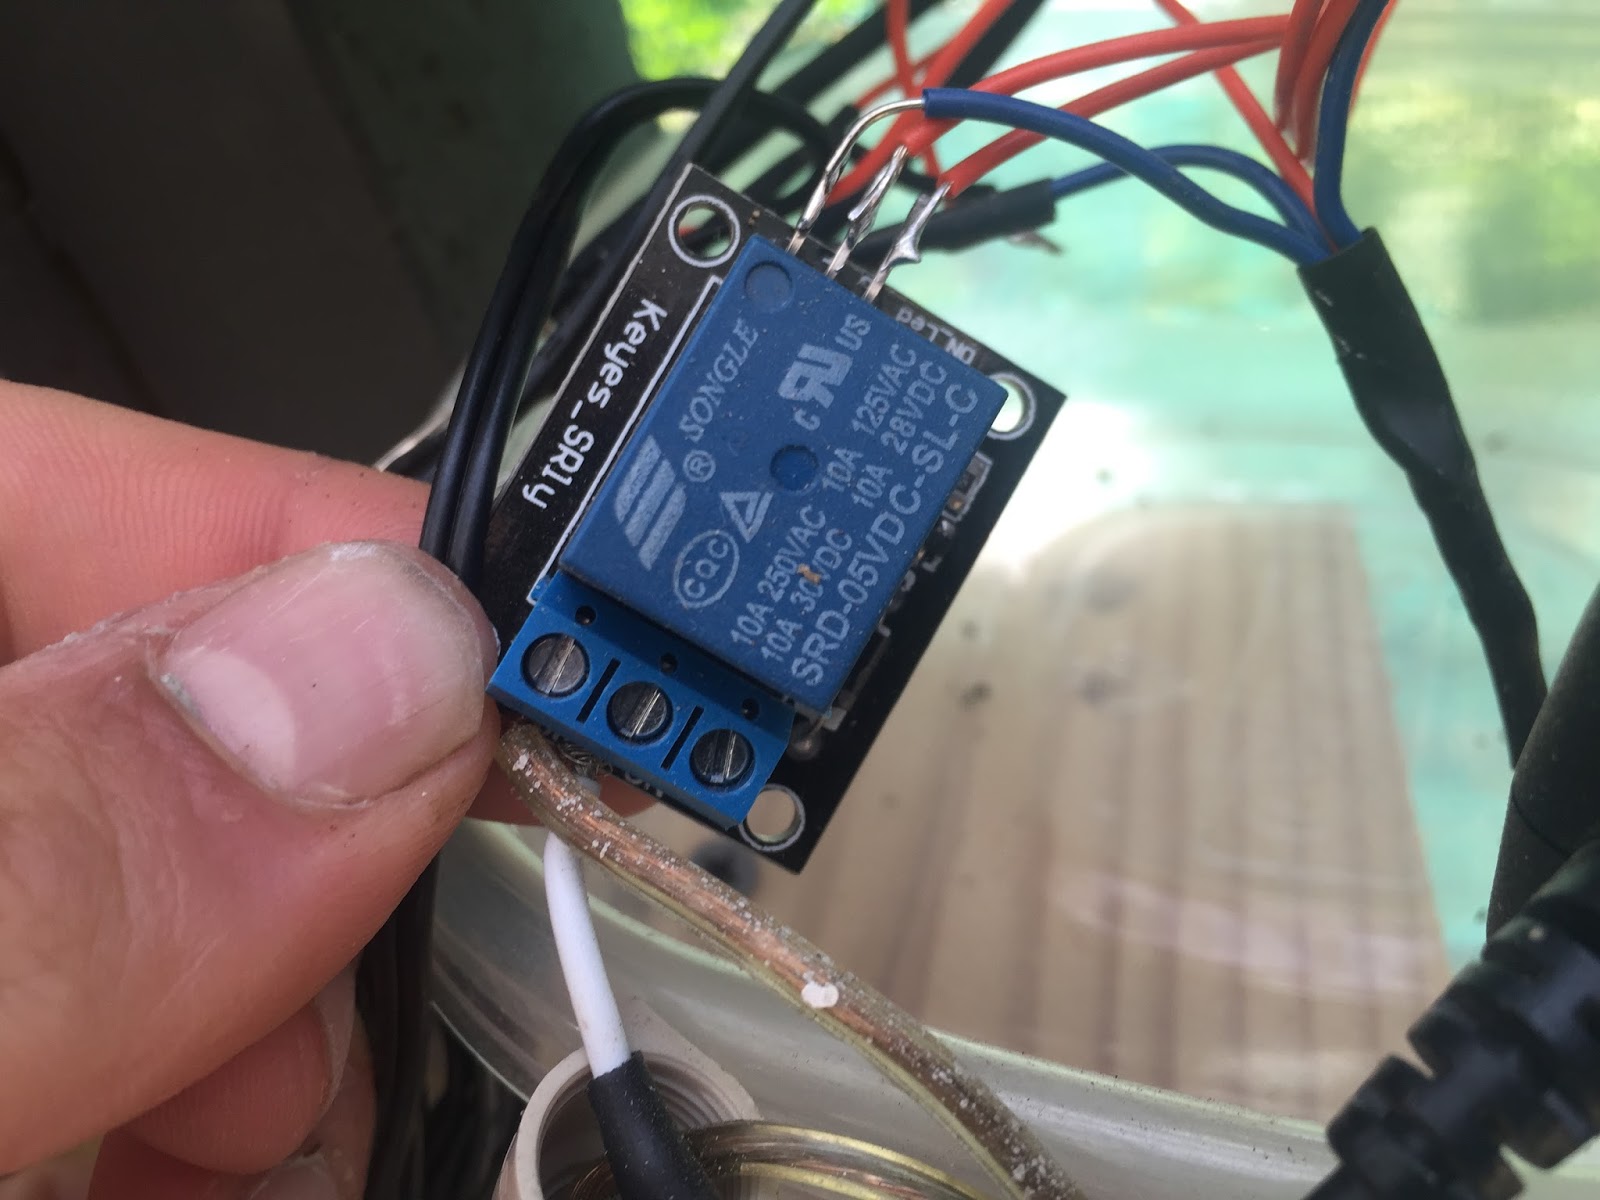
This is the relay. Its job is to send higher voltage on to the sprinkler valve. The power that the Arduino supplies is not nearly enough to open the valve, so all the Arduino is doing is telling this little guy to flip the switch on a higher power circuit. Note the larger brown and white wire that are screwed into the relay. Those wires complete the circuit from the 1A 19v power supply to the sprinkler valve. The blue and orange wires that are soldered on all run form the Arduino. See the wiring diagram below for more detail.
This is the DHT11. It tests the temperature and humidity and sends it back to the Arduino. With that info the arduino makes the decision on how often to open the valve. Right now i have it set up to mist the cuttings for 10 seconds every 6 min if the temp is over 90 deg. If the temp is between 80 and 90 it will mist every 10 min. Every 10 degree change adds time between mists.
The bright LED is an RGB LED. It changes color based on the temp. 90+ gives red light. 80-90 gives yellow. 70-80 green and so on...
Its a little hard to see, but this mister is in the middle of its spray cycle. You can also see that the mister itself is just screwed right into the PVC. So easy!
As you can see, this system is very effective at rooting cuttings. This is a comfrey leaf that was stuck in the sand two weeks earlier.
The honey berry took about 5 weeks to produce enough roots to sustain life outside the bed, but those were from hardwood cuttings in the middle of summer. Not bad!
This is a pruning off of a fig tree. It is just starting to push roots. I'll transplant this one in another week or so.
So far these are all the plants that we have pulled out of the sand. These are all cuttings from plants that were just growing on the property. Free plants!